A 3D printer does not understand shapes the way a person does. It understands positions, speeds, and amounts of material. Everything it makes, from a plastic bracket to a titanium implant, is built by repeating one simple operation: place a thin layer of material in exactly the right pattern, then move slightly and do it again. The technical name for this family of methods is additive manufacturing, because objects grow by adding material instead of being carved out of a block, which is the subtractive approach of milling and turning.
The distinction matters because it changes what is possible. A machinist cutting a part from solid metal must be able to reach every surface with a tool. A printer builds from the inside out and from the bottom up, so internal channels, lattices, and curved cavities cost little extra effort. That freedom explains why the technology spread from prototyping shops into medicine, aerospace, and hobbyist workshops, and why standards bodies such as NIST now devote whole research programs to measuring and qualifying printed parts.
From Digital Model to Layers
Every print begins as a three-dimensional digital model, usually a mesh of thousands of tiny triangles describing the outer surface. The printer cannot use that directly. A program called a slicer cuts the model into horizontal cross-sections, each as thick as a single layer, commonly a fraction of a millimeter for desktop machines. For every layer it calculates the outline to trace, the interior fill to add, and the order in which to do both.
The slicer then writes these decisions as a long list of commands, often in a simple text-based language known as G-code. Each line says, in effect, move to this coordinate at this speed and deposit this much material. The printer's controller reads the list line by line and drives its motors accordingly. The controller is a small cousin of the machines discussed in how robots perceive their surroundings, except that a printer usually works blind: it counts motor steps and trusts that the mechanics did what they were told.
Interior fill is a design decision, not a defect. A part printed as a honeycomb or grid inside a solid shell can be far lighter than a fully solid one while keeping much of its stiffness, since the strength of a structure depends on where material sits, not only on how much of it there is.
Melting and Extruding Plastic
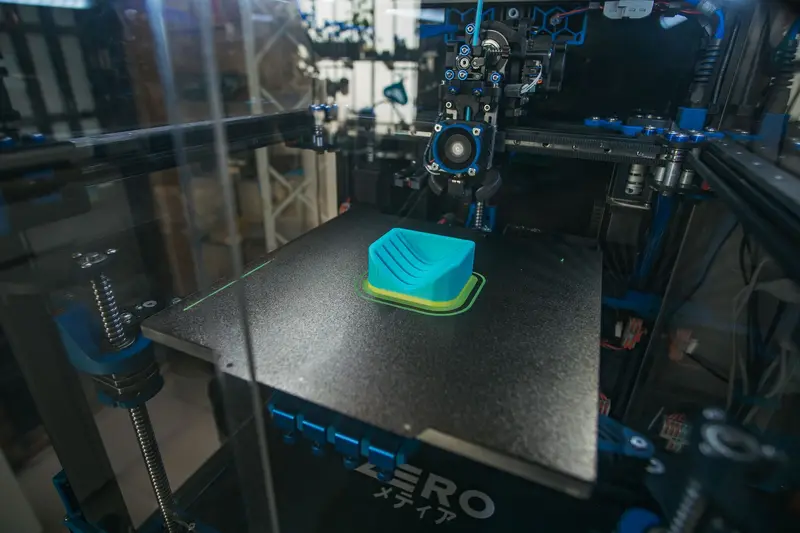
The most common desktop method is material extrusion, known commercially as fused deposition modeling and generically as fused filament fabrication. A spool feeds a thin plastic filament into a heated nozzle. The nozzle melts the plastic to a soft paste and pushes it out through an opening a fraction of a millimeter wide. Motors move the nozzle, the build platform, or both, so the bead of plastic is laid down along the path the slicer specified.
Timing is what makes the layers stick. The bead lands on plastic that is still warm from the previous pass, and the two surfaces fuse as they cool together. If the material cools too fast, layers bond weakly. If it stays too hot, it sags. That is why printers use cooling fans, heated beds, and carefully chosen temperatures for each polymer.
Overhangs expose a basic constraint. Every layer needs something underneath to rest on, so a feature that juts out over empty space collapses unless the slicer adds temporary support structures. These are printed alongside the part and broken or dissolved away afterward, which is one reason a finished print often shows small blemishes where supports touched it.
Curing Liquid and Fusing Powder
Other processes reach the same result by different physics. In vat photopolymerization, a tank holds liquid resin containing molecules that link into a solid network when struck by light of the right wavelength, typically ultraviolet. A laser or a projected image traces each layer's shape on the resin's surface, hardening only the exposed region. The platform then shifts by one layer thickness, and the process repeats. Because the light can be focused sharply, this method resolves finer detail than extrusion, at the cost of messier materials and a cleaning step afterward.
In powder bed fusion, a thin layer of fine powder, either polymer or metal, is spread across a platform. A laser or electron beam then melts or sinters selected spots, bonding grains to each other and to the layer below. A fresh layer of powder is raked on top, and the beam scans again. The unfused powder that surrounds the part acts as its own support, which is why these machines can produce complex geometry without printed scaffolding. NIST's additive manufacturing work lists these families, together with binder jetting, material jetting, and directed energy deposition, as the main technology categories.
A Short History
The first working layer-based process came from photochemistry rather than plastic filament. In the early 1980s, Hideo Kodama in Japan described a layered approach that used ultraviolet light to cure photosensitive polymer. In 1984, Chuck Hull filed a patent for what he named stereolithography, granted in 1986, and he co-founded 3D Systems to commercialize it. Extrusion followed in 1988, when S. Scott Crump, co-founder of Stratasys, developed fused deposition modeling.
The turning point for hobbyists came in 2009, when the key extrusion patent expired. Open-source communities such as RepRap, which had been designing self-replicating printers, could build on the freely available method, and prices dropped dramatically over the following years. Because the name FDM remained a trademark, those communities adopted the neutral term fused filament fabrication.
Where Printing Shines
Printing pays off when parts are complex, custom, or needed in small numbers. Dental aligners and hearing-aid shells are shaped to individual bodies. Engineers print prototypes overnight instead of waiting for tooling. Manufacturers produce fuel nozzles and brackets with internal passages that would be nearly impossible to machine. Metal printing can consolidate an assembly of many parts into a single piece, removing joints that might otherwise fail.
The same logic applies at home. A broken plastic clip on an appliance, a bracket sized for an odd shelf, or a replacement knob can be modeled and printed in an afternoon. As with the sensors and controllers in how drones stay stable in flight, many printed parts end up inside other machines.
Limits and Misconceptions
A common belief is that a 3D printer can make anything at the touch of a button. In practice, results depend on material behavior, calibration, and design that respects how layers form. Printed parts are usually weaker across their layers than along them, because the bonds between layers are not identical to the bulk material. Surface finish shows visible layer lines unless the part is sanded, smoothed, or cured further.
Speed is another limit. Building volume layer by layer takes hours for parts that injection molding produces in seconds, which is why printing suits variety and complexity more than mass production. Quality control is also a genuine research problem. The NIST program on additive manufacturing points to process variability, inconsistent material properties, and limited methods for qualifying parts as major barriers, which is why critical components are often inspected with X-ray computed tomography.
Finally, printing is not magic replication. The digital model is only as good as its designer, and a poorly designed file yields a poor object. Much of the craft lies in the file, in the same way that the efficiency of how file compression shrinks files lies in how the data is described before it is processed.
In Short
A 3D printer converts a digital model into physical form by slicing it into thin layers and depositing, curing, or fusing material one layer at a time. Different technologies use different physics, from melted filament to light-hardened resin to laser-fused powder, but all share the same principle: build from nothing upward, guided by coordinates. Understanding that principle explains both the technology's freedom to make complex shapes and its limits in strength, surface finish, and speed.